


Free Fire · Bermuda · Kalahari · Purgatory
A forced drop, a heavy landing. Before my boots hit the ground, a shotgun blast shatters the air-12 seconds, dead. Respawn. The exact same spot. A frantic scramble, no weapon in sight, the same blast, the same result.
That helpless feeling is not about your aim or reflexes. It comes down to a single decision you made before you hit the ground: where to land. While many players view landing merely as the start of a match, professionals recognize it as the most critical decision of the game. Your chosen landing spot dictates the quality of your loot, immediate threats, and your positioning for the first zone closure. Mastering your landing allows you to secure a significant advantage before the first shot is even fired.
Free Fire note: Unlike PUBG or BGMI, Free Fire's smaller map means you can glide farther off the path often 300–400 meters without losing altitude fast. The smaller player count per match (50 vs 100) also means hot drops are slightly more survivable, but your loot window is tighter. Speed matters more here.
3 Mistakes That Kill You Before the Fight
1. Following the plane path blindly
The center of the plane route is where most players land. If you follow it without thinking, you are walking into a 10-player war with no armor. Land at the very start or end of the flight path instead same loot, far fewer enemies.
Short path exception: When the flight path covers only one side of the map common in ranked go perpendicular. Even a 150-meter sideways glide puts you in a quieter loot pocket. On Bermuda, this means the coastal areas east of Pochinok or the edge lots near Mars Electric. On Kalahari, the sand ridges north of Moathouse are almost always empty when the path runs south.
2. Ignoring the safe zone
If your landing spot is on the far edge of the map and the zone closes in the opposite direction, you will spend the first five minutes running. You arrive late, you are already taking damage, and enemies are holding every corner. Always check the first zone before you commit to a drop.
3. Squad splitting at landing
Isolated landing results in instant wipes by coordinated squads. Always land within 50 meters of each other, using a single pre-jump marker for cohesion. For squads and duos, drop side-by-side to ensure immediate backup, map control, and survival against focused, aggressive teams.
Random squad tip: Before you jump, use the in-game ping on the map hold the mark button to drop a custom marker. Most players will follow a pinned marker even without voice chat. If they don't follow, adjust your glide toward the majority rather than splitting alone. One isolated player is the easiest target in the match.
How to Pick the Right Spot
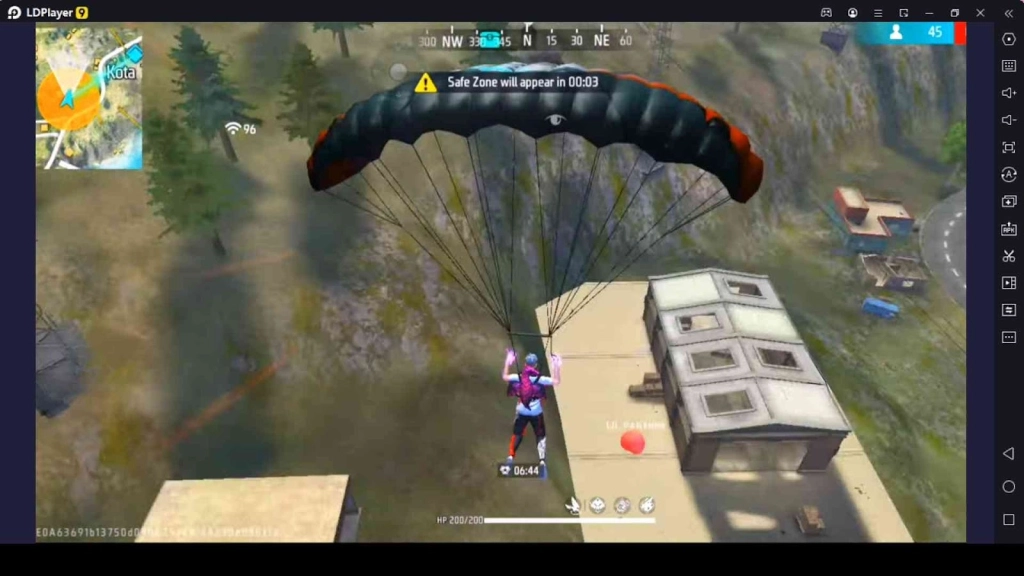
Before you jump, run through three quick checks:
- ▸Trace the full plane path. High-traffic spots sit directly beneath the center. Adjusting 200–300 meters off the path or going perpendicular on short paths can cut your competition in half.
- ▸Count rivals in the air. While falling, take two seconds to count the players gliding toward your target. Five or more heading the same way? Adjust your glide immediately. A slightly worse loot spot with no competition beats a great spot already overrun.
- ▸Check the first zone. Land inside it or close enough to reach on foot within two minutes. Players who land far from the zone are always under pressure they cannot stop to fight, and they often die to the circle rather than to enemies.
One universal rule: land 20–30 meters off your main marker. This small offset means you are not sharing a landing point with the one other player who had the exact same idea. You grab loot first and hold the advantage in any fight that follows.
What to Loot First After Landing
Most players grab the best-looking gun they see and stop moving. That hesitation costs them the fight. Here is the actual priority order:
1. Gun: First thing on landing: Pistol, shotgun, anything your hands cannot be empty. Pick up the first gun you see and keep moving. A better gun will come later, but right now, something beats nothing.
2. Armor: Right after the gun
- ▸Level 3 (Gold) Best, maximum protection
- ▸Level 2 (Blue) Solid, works in most fights
- ▸Level 1 (White) Still pick it up, better than nothing
Whatever level you find, take it. Even Level 1 makes a shotgun blast survivable. Without armor, one shot can finish you instantly.
3. Medkits or Mushrooms (Third priority): Taking damage in the first 90 seconds is almost guaranteed. Keep a minimum of 2 medkits on you. Mushrooms also work they heal faster and take less bag space. Pick these up right after the gun and armor; do not save them for later.
4. Helmet: Fourth
- ▸Level 3 (Gold) Dramatically reduces headshot damage.
- ▸Level 2 (Blue) Good protection
- ▸Level 1 (White) Still worth picking up
The helmet comes after armor because armor covers your whole body, and most shots hit the body. But grab a helmet whenever you get the chance headshots are the number one cause of instant knockdowns.
5. Backpack: Last priority. A backpack is not an emergency on landing. Survive first, upgrade capacity later. Level 2 or 3 becomes important in mid-game when you need to carry more ammo, grenades, and heals but do not chase it in the first 60 seconds.
Do not stop to loot every crate when enemies are nearby. The fastest loop is: gun → armor → move to next building → heal as needed. Looting in the open while an enemy watches from above is how most early deaths happen.
Best Spots by Playstyle
Aggressive
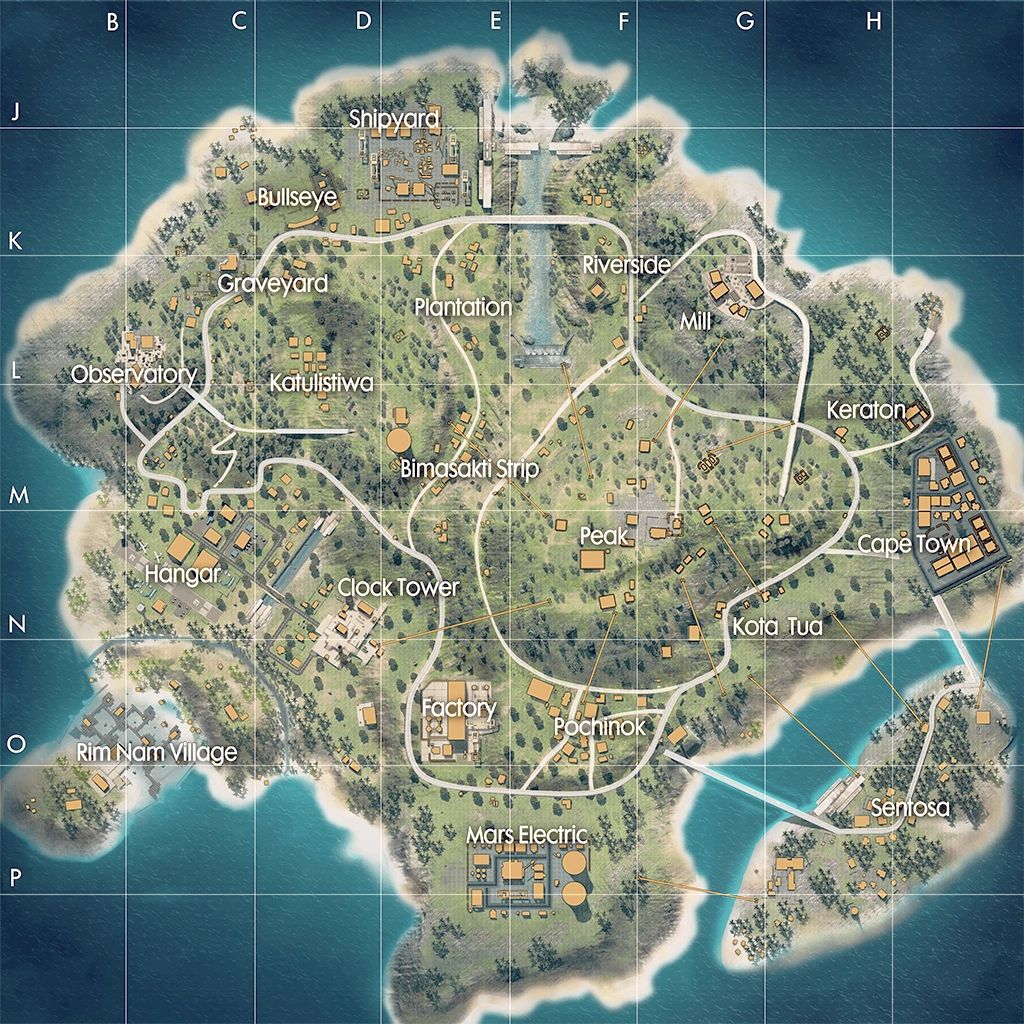
Clock Tower (Bermuda), Peak (Kalahari), Brasilia (Purgatory)
High loot density, high competition. At Clock Tower, land on the rooftop for an immediate height advantage and control who comes to you. Peak works similarly on Kalahari. Grab the key from both locations, snag the first weapon you see, and keep moving. Slow looting here means death.
Balanced
Pochinok, Hangar (Bermuda)
Good loot without walking into a massacre. Pochinok has reliable loot spread across a wide area. Hangar is especially useful because vehicles spawn there regularly, making post-loot rotation to any zone position easy. Both work well for ranked squad play.
Beginners and Survival
Sentosa, Mars Electric (Bermuda), Riverside (Kalahari), Campsite (Purgatory)
If your goal is to reach the top ten consistently, these are your spots. Sentosa and Mars Electric rarely draw more than two or three players and have enough loot to gear up fully. If you are grinding ranked, survival is worth more than early kills always prioritize safe zones over exciting ones.
The Bottom Line
Winning isn't just about superior aim, but rather consistent strategic habits: smart drops, fast looting, and prioritizing survival over easy engagements. Successful players secure victory by controlling engagements, maximizing efficiency, and never giving enemies an easy first shot.
Study the plane path. Pick your spot with intention. Count your competition in the air. Know your loot priority the moment your feet hit the ground. Give yourself a real chance before the first bullet is fired.
Where do you usually land?
Drop your go-to spot in the comments and hot dropper or safe lander, we want to know. Share this with your squad if it helped.
