Free Fire Grenade Guide: Master the Pro 'Cooking' Trick to Win Every Fight
May 8, 2026
15 min read
Most players in Free Fire lose fights they should have won because they throw grenades like a beginner. They lob it, bounce it, the enemy sees it, steps back, and survives with 10 HP. The fight continues, and the advantage is wasted completely.
The players who consistently confirm kills and break gloo wall setups with grenades are using a technique called cooking. It is not complicated, but it requires understanding the timer, the distance, and when to apply it in each situation. Once you have it, grenades become one of the most reliable tools in your kit.
This guide covers every grenade type, the full cooking technique with exact timing, every situation where it applies, advanced tricks that pro players use in the current meta, and the mistakes that cost players fights every single match.
Why Grenades Win More Fights Than Bullets
The Advantage Grenades Give You
A grenade lets you deal damage without exposing your body. Bullets require you to peek, aim, and exchange fire while taking return damage. A well-timed grenade does damage from behind full cover while the enemy has no shot at you whatsoever. That asymmetry is the entire reason pro players carry grenades in every match regardless of their weapon loadout.
Compete on ZP Battle Zone
Apply what you just learned
Join 35,000+ Pakistani players competing in live Free Fire tournaments every week. Verified results, fair play, organized competition.
Grenades also solve problems that bullets cannot. A knock enemy behind a gloo wall is out of your line of sight. A grenade is not. A squad camping on the corner of a building can hold off bullets indefinitely. A cooked grenade through the window ends that hold in under two seconds. Grenades change the math of a fight in ways that aim alone cannot.
What This Guide Will Teach You
You will learn the exact cooking timer for every distance, how to apply it in specific situations from final-circle holds to building pushes, the advanced jump-cook technique for extra distance, how to coordinate grenades with your squad, and the three mistakes that cause most players to waste their grenades every single match.
Grenade Types in Free Fire and When to Use Each One
Frag Grenade: Your Primary Weapon
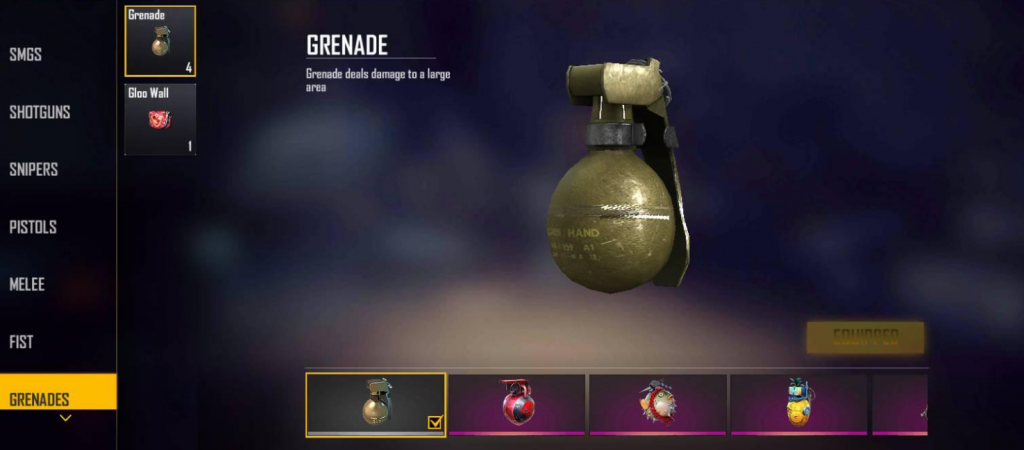
The frag grenade is the core tool for the cooking technique. It deals area-of-effect damage on explosion and is the grenade that kills knocked players, breaks gloo walls, and flushes enemies out of buildings. If you are only going to master one grenade, it is this one.
The frag grenade has a five-second fuse from the moment you activate it. Cooking burns through part of that fuse in your hand, so the grenade explodes shortly after landing rather than giving the enemy time to react and relocate. Every time the rule in this guide applies to the frag grenade.
Flashbang: Control Before the Push
The flashbang blinds and deafens enemies in its blast radius for a short window, typically around two to three seconds. It does not deal damage, but it creates the perfect entry window for a rush. Use it just before pushing a doorway or corner where you know an enemy is holding. A blinded enemy cannot accurately return fire during your entry.
The flashbang does not need to be cooked the same way a frag does. Throw it at the target position so it detonates on arrival, and move immediately after. The combination of flashbang followed by an immediate push is one of the most reliable building-clear techniques in the current meta.
Smoke Grenade: Cover for Everything
Smoke grenades create a cloud that blocks enemy vision and disables aim assist for anyone outside it. Use smoke to cover revives in the open, to cross dangerous terrain during a rotation, or to obscure your position before a grenade throw when you need to stand exposed briefly. Smoke does not need cooking. Deploy it directly in the area you want to cover and use the concealment it provides.
What Grenade Cooking Actually Means
The Concept Explained Simply
Cooking a grenade means holding it after activation for a set number of seconds before you throw it. The fuse counts down in your hand during that hold. When you release, the grenade travels to its target with only the remaining fuse time left. The result is that the grenade explodes almost immediately on landing, giving the enemy no time to see it, react to it, or move away from it.
Without cooking, a grenade lands, bounces, sits for a few seconds, and then explodes. Any aware player has time to step back or move to cover during that gap. With proper cooking, the gap between landing and explosion is under a second. The enemy is hit before their brain registers what happened.
Before and After: The Difference Cooking Makes
Imagine an enemy knocked behind their own gloo wall. You throw an uncooked grenade. It lands beside the wall, and the enemy’s squad sees it in time; they shift position, and the grenade explodes in empty space. The knocked enemy gets revived, and the fight resets against you.
Now cook the same grenade for two seconds. It arrives at the gloo wall and detonates on impact. The knocked enemy is eliminated before anyone can react, and you controlled the fight from behind full cover without exchanging a single bullet. That is the practical difference between an uncooled and a cooked grenade, and it applies in every situation this guide covers
The Pro Cooking Timer: Exact Numbers by Distance
How the Fuse Timer Works
The frag grenade’s total fuse is five seconds. The countdown timer is visible on screen the moment you activate it. Your job is to hold the grenade long enough that by the time it travels to the target and lands, the remaining fuse is one second or less. That is what creates the near-instant detonation that enemies cannot avoid.
The safe cooking window is between 1.5 and 2.5 seconds of hold time. Never hold beyond 2.5 seconds on a close-range throw because the grenade will detonate in your hand or within a metre of your position. The specific number within that window depends entirely on the distance to your target.
Close Range: Under 20 Metres
For targets within roughly 20 metres, cook for 1.5 to 2 seconds before throwing. At this distance, the grenade travels fast, and your cook time needs to be shorter to account for the reduced flight time. A 2-second cook at close range is near the limit. Anything beyond that risks self-damage.
At close range, the underarm throw is significantly better than the overhand throw. An overhand throw at close quarters bounces unpredictably off walls and can come back toward you. The underarm throw places the grenade precisely at the target with minimal bounce. Switch to underarm whenever you are inside a building or within a tight compound.
Medium Range: 20 to 40 Metres
For medium-distance targets, cook between 1 and 1.8 seconds. The grenade needs more air time at this distance, so you cook less in hand to allow the fuse to run down during the longer flight path. At 1.5 seconds of cook time, the grenade will arrive at a 30-metre target and explode within roughly one second of landing.
Long Range: 40 Metres and Beyond
For long-range throws, cook for 1 to 1.5 seconds maximum. At this distance, the grenade is in the air for a long time, which means the fuse continues burning during flight. A short cook combined with a high-angle throw positions the grenade to arrive and explode on contact rather than giving the enemy time to react during a long roll across the ground.
For very long throws, use the high-angle trajectory mode in your throw settings. This lobs the grenade in an arc that covers the distance without requiring you to expose yourself for a flat-angle throw. Cook at 1 second and release with the high-angle setting for maximum range throws that still detonate on landing.
Practicing the Timer in Training Mode
Go to Training Mode and practice cook times at three specific distances: close, medium, and long. Cook at 1.5 seconds, then 2 seconds, then 2.5 seconds, and observe where and when each detonates relative to the target. Repeat this until the feel of each timing becomes automatic rather than something you have to consciously calculate during a ranked match.
The goal of training drills is not just accuracy. It is building the instinct to know which cook time to apply the moment you assess a situation. Once that instinct is in place, your grenade usage in real matches becomes fluid rather than hesitant.
When and Where to Use the Cooking Trick
Finishing Knocked Enemies
A knocked enemy behind a gloo wall or inside a building is the most common situation where the cooking trick pays off. Cook your frag for two seconds and throw it directly to the knocked player’s position. The explosion damages through gloo walls and eliminates them before their squad can complete a revive.
Always stay behind your own cover when making this throw. Do not stand in the open to aim the grenade. Use gloo walls or natural cover as your base, peek only your throwing arm if necessary, and release from that protected position. Throwing a grenade should never expose your body to enemy fire.
Breaking Gloo Walls and Building Holds
Gloo walls are destructible. A cooked frag grenade thrown at the base of a gloo wall deals significant structural damage and often destroys it entirely, removing the cover the enemy was using. Aim for the bottom edge of the wall rather than the top or middle. The explosion radius at ground level catches both the wall structure and any enemy positioned directly behind it.
For enemies camping inside a building, throw the cooked grenade through a window or at the doorway threshold rather than against the wall outside. A grenade that enters the interior of a room deals full damage to everything inside. A grenade that hits the exterior wall loses most of its effective radius to the structure.
Flush-Outs and Forcing Movement
Sometimes the goal of a grenade is not to kill but to move. An enemy holding a corner with a sniper or a squad anchored in a compound can be displaced by a cooked grenade throw near their position. The moment they reposition to avoid the blast, they expose themselves to your squad’s fire from the surrounding angles.
Combining a frag grenade with a flashbang takes this a step further. Throw the flashbang at the hold position first. As the enemy is blinded and scrambling to reposition, throw the cooked frag toward where they are most likely to move. This two-throw combination requires coordination with your squad, but it produces clean kills out of entrenched positions that would otherwise be extremely costly to push directly.
Final Circle Control
The final two circles in Free Fire are where grenades become decisive. The safe zone is small, squads are close together, and everyone is behind whatever cover they can find. Cooked frag grenades thrown from behind your own position reach the enemy’s cover without exposing you to the crossfire of every remaining squad simultaneously.
In the final circle, use short-cook grenades aimed at the perimeter of enemy cover rather than over it. A grenade landing at the base of a rock or building edge catches the players positioned there without requiring a perfect arc over the top. Keep your throws short and precise. Overcooking in tight final-circle conditions catches you or your own squad members.
Advanced Grenade Tricks Pro Players Use
Jump-Cooking for Extra Distance
Jumping while cooking a grenade extends the effective throw distance significantly. The mechanic works because your throwing arc starts higher when you are in the air, giving the grenade a longer downward trajectory to cover additional horizontal distance. This is the technique to use when an enemy is behind cover at the far edge of your normal throw range.
The sweet spot for a jump-cook is to cook for 2 to 2.5 seconds before releasing at the peak of your jump. Jump, cook to your target time, and release at the top of the arc. The grenade travels further than a ground-level throw at the same cook time. Practice this in training mode specifically so the coordination between jump timing and cook time becomes reliable under pressure.
Throwing Through Walls and Gaps
Free Fire has specific spots in its building geometry where grenades can be thrown through wall gaps, floor gaps, and container sides. Crouching next to a container and angling your throw slightly into the side geometry can place a grenade inside without entering. Small gaps at the base of building walls allow grenades to slide underneath and detonate inside if your angle and aim are correct.
These spots require specific positioning that is map and building dependent. The most consistent way to learn them is through custom room exploration with a partner. Have your partner stand inside the structure while you test throw angles from outside until you find the entry points that work. Once learned, these spots give you kills against players who believe they are fully protected.
Squad-Coordinated Grenade Timing
The most effective grenade usage in squad play is coordinated. Tell your team the grenade is cooking and give them a countdown before it lands. A simple callout like a grenade in two seconds on the right door tells your squad exactly when to push the opposite entrance the moment the enemy reacts to the blast.
Multiple grenades with staggered cook times are significantly harder to avoid than a single grenade. If two squad members throw frags at one-second intervals to the same position, the enemy must escape the first blast radius but runs directly into the second. Coordinating this with two players before a building rush produces clean eliminations on well-defended positions with minimal risk to your squad.
Common Grenade Mistakes and How to Fix Them
Throwing Too Early With No Cook
The most frequent mistake is pressing throw immediately without any hold time. The grenade travels to the target with a full remaining fuse, bounces, and sits visible on the ground for several seconds. Any player who sees a grenade with two or three seconds left on its fuse has more than enough time to step out of its blast radius. Every grenade you throw without cooking is a wasted item.
The fix is simple. Make it a rule that you never throw a frag grenade without holding for at least one second first. Even one second of cook time at medium range cuts the enemy’s reaction window down to barely enough time to notice the grenade, let alone move away from it.
Cooking Too Long and Self-Damaging
Holding past 2.5 seconds is how players eliminate themselves in the middle of a fight. The grenade detonates in hand or at point-blank range, damaging or knocking the thrower and alerting every nearby squad to exactly where you are. This is especially common in close-range indoor situations where players panic-hold longer than they should.
Set the 2.5-second limit as a hard ceiling in your mind. If you have held for 2.5 seconds and cannot throw for any reason, release immediately rather than continuing to hold. The grenade rolling away from you is a better outcome than it detonating in your hand.
Poor Aim Despite Correct Timing
Perfect cook time with inaccurate aim to make a well-timed grenade that lands three metres away from the target and deals no meaningful damage. Timing and accuracy must develop together. The most common aiming error is not accounting for the grenade’s bounce trajectory and throwing directly at the enemy rather than slightly in front of them, so the bounce carries it to the target position.
Training mode is the only fix for this. Throw at stationary targets at each distance range until your aim for each cook-and-release combination is consistent. Then introduce moving targets. Accurate grenade throws are a mechanical skill that only improves through deliberate repetition, not through reading about it.
Quick Grenade Checklist for Every Match
Before You Throw
▸Confirm your distance to the target and select the right cook time: 1.5 to 2 seconds for close range, 1 to 1.8 seconds for medium, and 1 to 1.5 seconds for long range.
▸Position yourself behind cover before activating the grenade. Never cook from an exposed position.
▸Use the underarm throw for close-range indoor situations to control the bounce path.
During the Throw
▸Never hold past 2.5 seconds under any circumstances.
▸For extra distance, jump at the moment of release to extend the throw range.
▸Aim in front of the target’s position to account for the bounce and roll.
With Your Squad
▸Call out your grenade and give a countdown so your team knows when to push.
▸Coordinate staggered throws with a squadmate for double-grenade pressure on one position.
▸Combine frag and flashbang throws with one to two seconds between them for maximum disruption before a push.
Grenades are not a secondary option in Free Fire. They are a primary tool that every serious player should be using in every match. The cooking technique is the difference between grenades that confirm kills and grenades that are thrown away. Start with the timer, build the habit in training, and apply it to the situations in this guide one at a time.
Stop wasting grenades. Start winning with them.
Every kill you should have confirmed but did not, is a grenade that was not cooked. Start with the 2-second drill in training mode today. Ten throws at each distance range is all it takes to build the timing instinct. When you are ready to stack every other advantage on top of your grenade mechanics, explore our guides on pro sensitivity settings for faster throws, the best character builds that synergize with utility play, and squad coordination strategies that turn cooked grenades into guaranteed Booyahs.